
I’m super excited to share this how-to with you this week, because honestly, I think I may have discovered a DIY home project that is BARELY documented online! The result of this DIY project turned out amazing, and easy enough that truly anyone can pull it off. So let me tell you how it came to be…
As you may know, we are currently in the middle of a full-blown renovation for a home that we purchased earlier this summer. The home was flooded during Hurricane Harvey, so the previous owners gutted the entire house, all the way down to the studs. We purchased this blank canvas house, and have been putting it back together, piece by piece! For many this would be a nightmare, but I’m having so much fun with it lol. (You can check out the progression of this renovation project: follow me on Instagram @studioLinteriordesign and it is saved in my Story highlights and under #studioLplacetodwell).
Earlier on in the renovation, (a couple of months ago) I had California Closets come out for a consultation for our teeny-tiny master closet. Richard and I will be sharing this closet, so I felt it was important to bring in some pros to help maximize every inch of space with smart storage (and this is an area I don’t feel particularly skilled in). The consultation with California Closets was great, and we signed off on their storage system, which the consultant advised would be built and ready to install in about 2 months. She also advised – before closet installation day, have the walls painted and carpet installed. Made sense to me!
Fast forward to last week, and I found myself in a bit of a pickle. The installation with California Closets had been scheduled, and was only a week away. Very exciting, but I had failed to source carpet for the master closet! It was not the proper time in the renovation to have carpeting installed in our two guest bedrooms, since wall painting and messy projects were still underway. But I really needed to find a carpet remnant at least for the master closet, and get it installed ASAP. So, I visited a few local carpet showrooms, and asked if they sold any carpet remnants (smaller carpet pieces leftover from previous jobs) and if they would do the installation. All of the showrooms seemed a bit annoyed with this request, because they would have to dig through their storage of old carpet remnants (which is cumbersome). And I could also tell that they were overcharging on their installation, b/c the area is so small they needed to make it worth their time to come out and do the work. And to be honest, the available carpet remnants they were showing me were boring and plain and blah.
So, I decided to think on the problem for a bit – there had to be a better solution. I was chatting with my mom about the issue, as we were in her living room. I explained that I would love to find something patterned and more interesting to put in the master closet, since it is really a standalone space, and did not need to match the other carpeted guest bedrooms. But, I definitely did not have the time/budget to order a specialty patterned carpet, and then wait for installation. As we were discussing, she and I had the “lightbulb moment” at the same time! I looked down on her pretty area rug in her living room, as she said “Why couldn’t you just buy an area rug, and then have it cut and installed just like wall to wall carpet?” Brilliant!
I was instantly excited by the idea, and hurried online to make sure it could work. I searched a bunch of different carpet and area rug terms, looking for the step-by-step DIY blog out there to tell me how to do it. Well – to my surprise, I couldn’t find a thing! Online, I really only found a couple of discussion threads with people asking if a rug could be glued down, and one commenter mentioned that it shouldn’t be a problem, because hotels and commercial spaces glue down carpeting all the time. Of course! I now had a rough general idea of the solution – find a great area rug, cut it to size of the closet, and glue down.

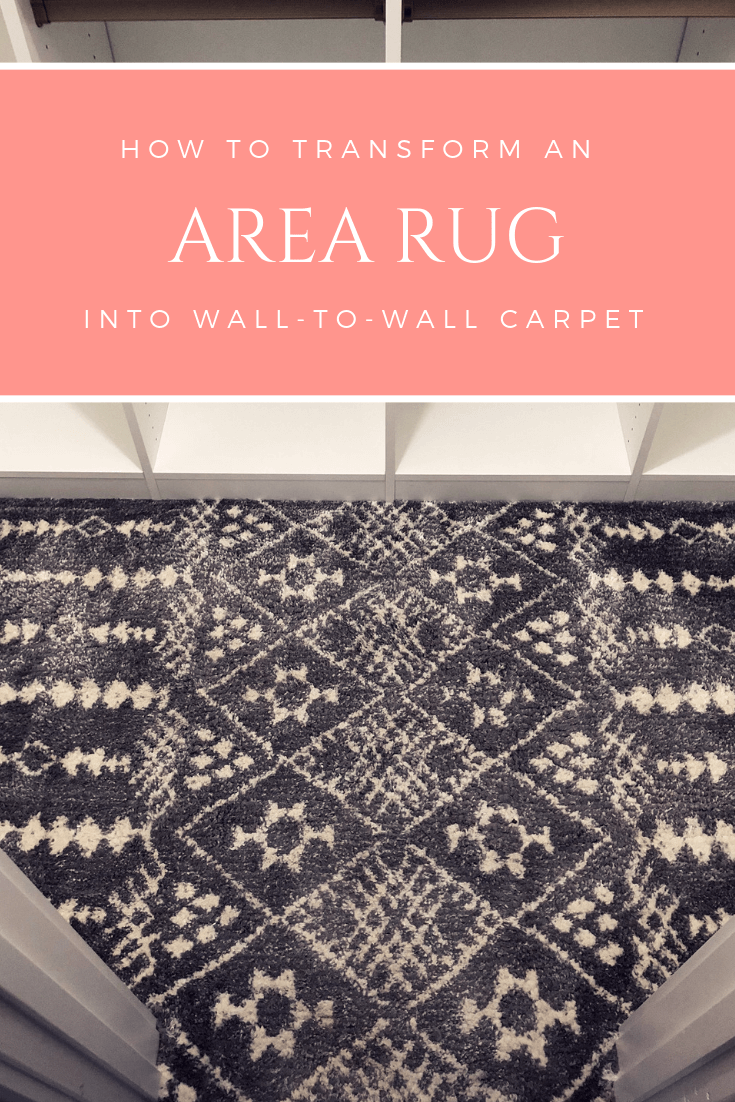
Found this plush beauty at my local Home Goods store – for just $129.00.
How to Transform an Area Rug into Wall-to-Wall Carpet – #1 FIND THE RUG
So the process starts with finding the perfect area rug, and oh yes, size matters. Start by doing a precise measure of your space. In my case, the closet (from sheetrock to sheetrock – no baseboards were yet installed) was 7’6” x 4’2”.
If time allows (in my case it did not) shopping for an area rug online would be a great way to narrow by size/material/style/price point.
I locally shopped a few different Home Goods stores, which was actually very helpful in narrowing down my options – by desired softness and thickness. I ended up finding “the one” (pictured above) at a Home Goods for $129. I cannot tell you how soft this thing is! The rug I found was 7’6″ x 5′. So the width would fit my closet perfectly, and the depth was only slightly larger – also perfect!
So, it’s worth mentioning that this DIY project works better in smaller spaces, like closets and VERY small rooms. The key is being able to find an area rug that is at least a bit larger than the room dimensions. And remember, the larger the rug, the harder it is to handle. In my case, the small rug was no problem at all to deal with, but I can envision the project being much harder in a larger space.
As you are searching, remember that the pattern of the rug also makes a difference in how it will read once installed. If the rug has a very organized, all-over geometric-type pattern, that would be great in a small closet, especially if you might have cabinetry being installed on top of it, because the cabinetry won’t cut off an important part of the pattern. On the other hand, if you are installing an area rug in a small room, maybe with only furniture items on top, you could have a more irregular pattern. For my own project, I kept being drawn to rugs that had a border around the perimeter – and I suspected those wouldn’t work as well. I wanted the center of the rug to be centered in the room, and the border would then have to be cut off some, which would be less than desirable. So, I found a rug that had a pattern with a distinct center, that would still look great if I had to cut off some of the rug edges.
The other important variable when searching for the right area rug – pay attention to the rug backing. We will talk more about the glue in a minute, but the glue I used explicitly instructs to NOT use on pure vinyl backed carpet/rugs. The glue instructions state these rug backings as being acceptable: polypropylene, woven, Axminster, Wilton, hot melt, Unitary, needle-punch, urethane foam, sponge-rubber, jute and latex-foam.

How to Transform an Area Rug into Wall-to-Wall Carpet – #2 PREP THE SPACE
Like I mentioned before, this closet did not yet have any baseboard trim installed, which I would recommend for ease of installation. And of course, there was no existing flooring here (previous flooring had been demolished) so we were working with the concrete slab.
To start off our DIY project, I gathered the motley crew – myself, my husband Richard, and my Dad. We needed to first prep the concrete slab, so we removed a few old framing nails, and then scraped the concrete with a floor scraper. This removes old flooring adhesive and any other raised junk that was stuck on the concrete. This step took us about 30 minutes, and a little bit of elbow grease.
Final prep step – thoroughly clean the floor. We used a shop-vac to get up all the dust and gunk we scraped up. Now another disclaimer – the carpet glue recommended to then mop the floor with water to get up all remaining dust, and then let the subfloor dry at least 12 hours before applying the glue. Well, time was running out so we skipped this step – don’t tell anyone! 🙂
How to Transform an Area Rug into Wall-to-Wall Carpet – #3 CUT A RUG
With our surface smooth and clean, we were ready to lay out the rug. We brought the rug into the space, and then rolled it out, and began to line up the center of the rug with the center of the area. The oversized edges of the rug we let fold over up the walls, because this step is about getting the rug in the EXACT place you want it on the floor. Check and then double check that your rug is centered in place.
Then, we carefully folded the “extra” rug edges over, getting the fold as close as we could to the wall edge. We then used our long level as a straight edge to draw a dark Sharpie cut line on the back of the rug (directly onto the rug backing). We continued to draw our cut lines on the back of the rug, all around the edges of the room. Be careful during this process to not shift the rug at all – you want the rug to stay dead center.
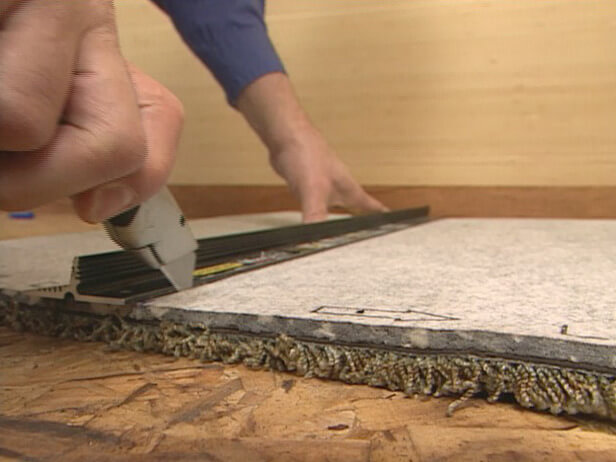
Once all of your cut lines are drawn, you can remove the rug from the room and get settled in a larger spacious area. Flip the rug over, and use your knife and straight edge to cut along your Sharpie cut lines. The ease of the cutting process will probably depend the type of backing your rug has – ours had a thin woven backing, and the cutting process was quick and painless!
After all of your big cuts are complete, transfer the rug back into the space, and get the rug perfectly on your center again. If you need to make any cut adjustments, you can probably do it with the rug in place. This is what we did around the more detailed trim areas around the closet entry door.

How to Transform an Area Rug into Wall-to-Wall Carpet – #4 GLUE IT DOWN
Now, it’s time for glue! Standing on top of the center of your rug, reach to one side of the rug, and fold it back, basically in half, so that then half of your concrete subfloor is exposed. Using your notch trowel, spoon out some glue in little blobs onto the concrete. Then start spreading a thin layer of glue all over the concrete, using the notched edge of the trowel – you want ridges in the glue! Be mindful to not get any glue on the good/top side of the rug. Trowel on the glue all the way to the corners and edges, as close to the wall as you can. This should be pretty quick – the glue does not have to be perfect.
Once your glue is evenly applied to the entire half of your space, it’s time to lay half of the rug down! All 3 of us stood inside the closet on top of the good side of the rug (don’t step on any glue!), and picked up the edge of the folded over rug. We held the edge of the rug up high, and then slowly lowered that side of the rug on top of the glue, shuffling our feet along to smooth it out as we lowered. When the rug is fully lowered, get on your hands and knees to smooth it out, pressing it firmly into the glue, and pushing towards the outside edges of the room to get out any pockets or bubbles. If your rug is thick, this should be pretty easy. We took about 3-5 minutes to press down and smooth out and push that side of the rug down into the glue.
Now, it’s time to repeat on the other side! Just stand in the center of the rug again, and then fold back the other side of the rug, and complete all of the steps above.
When you are pressing the rug down into the glue, on the edges the rug might be too thick to push under the edge of the sheetrock. You can use a clean putty knife to wedge the edge under the sheetrock for a perfect fit.
Keep in mind that the edges don’t have to be absolutely perfect, because you will install baseboards later that will cover up the perimeter carpet edge.
Check out this goofy video of us in the middle of the DIY action – and I hope the visual helps make sense of these instructions!
So for those of you that are looking for a condensed version of this lengthy DIY, here you go:


